iTerm2 结合 Oh My Zsh 的主题配置实践
预期效果
本文将介绍结合 iTerm2 和 Oh My Zsh 来美化 macOS 下的显示效果,先放一张最终效果图:

接下来我们来看下针对 iTerms2 终端进行美化的具体步骤。
具体步骤
0x00 下载软件
- iTerm2: https://iterm2.com/downloads.html
- Oh My Zsh (OMZ): https://ohmyz.sh/
安装 OMZ
1 | sh -c "$(curl -fsSL https://raw.github.com/ohmyzsh/ohmyzsh/master/tools/install.sh)" |
0x01 安装 OMZ 插件
下载插件
1 | 下载 OMZ 插件 zsh-syntax-highlighting |
启用插件
打开 $HOME/.zshrc 加入以下脚本内容:
1 | plugins=( |
0x02 安装 Nerd Fonts
整个 Nerd Font 仓库将近 1G 大小,其中 99% 部分都是我们不需要的,因此我们没必要将整个仓库克隆至本地。我这里推荐使用的字体是 Adobe 的 Source Code Pro 和 微软公司的 Cascadia Code。为支持更丰富的显示,Nerd Font 提供了这两个字体的补丁字体(Patched Font),下载地址如下:
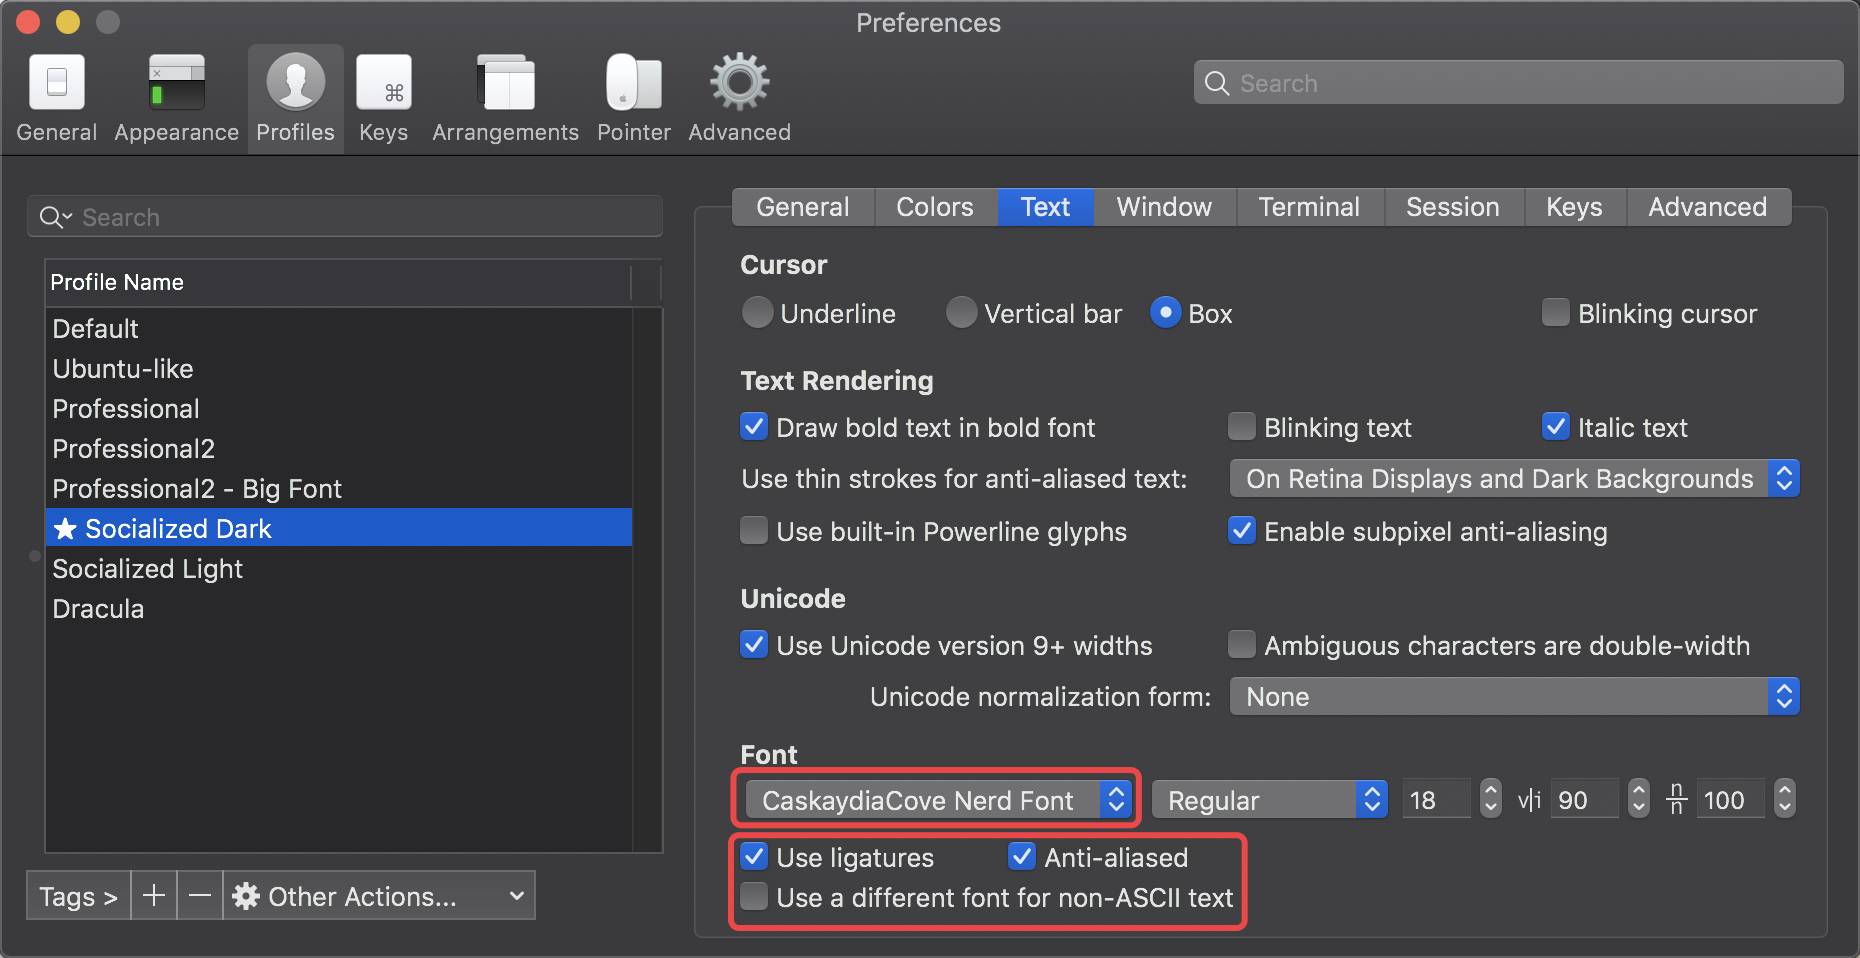
0x03 配置 iTerm2
⌘+, 打开 iTerm2 的设置界面,选择你当前的配置文件,这里推荐使用 Socialized Dark,之后按照如图所示选择正确的补丁字体,并勾选必要的勾选项:
0x04 安装和配置 powerlevel9k 主题
我们根据官方指引来为 OMZ 安装 powerlevel9k 主题:
1 | git clone https://github.com/bhilburn/powerlevel9k.git ~/.oh-my-zsh/custom/themes/powerlevel9k |
编辑 $HOME/.zshrc 文件,并加入以下内容:
1 | POWERLEVEL9K_MODE='nerdfont-complete' |
具体的参数解释可参见 powerlevel9k 的 Wiki,最后就会得到文章开头的“预期效果”!